SuperCPS
Written by Ben
Last updated on 2008-01-22
Introduction
SuperCPS is a high powered rubber-based CPS water gun very much like the CPS 2000, CPS 2500, CPS 3000, and CPS 3200. It uses a backpack to store water. The gun was designed to be used in water wars because it features long range, a very large pressure chamber, a compact design, and CPS. The range with a 3/16 inch nozzle is 58 feet effective range, 63 feet to the last drop, with two layers of latex rubber tubing and 8 or more bike tubes layered.
Construction of the water gun took place over two years. I finished the gun in 2004, but some parts of the gun did not work quite right, so it wasn't until 2006 that I completed the water gun to my satisfaction. For that reason, more step-by-step instructions are not available, but, if you can make the APH, you can follow this guide. If you have not made an APH or any other type of homemade water gun, I would suggest at the very least reading through the APH guide to have a good idea of how to build a water gun.
This water gun uses a homemade water backpack. There is no on-board water reservoir. Check out our backpack page for instructions on how to build a backpack and our customizations page to see how to build an on-board reservoir.
Rubber CPS basics
This water gun uses latex rubber tubing from McMaster-Carr. Visit McMaster-Carr's website and do a search for latex rubber tubing. The latex rubber tubing (abbreviated as LRT) comes in a variety of sizes and is nearly the exact same product used in the Super Soaker CPS water guns. In their notation, ID means internal diameter, OD means outer diameter, and wall means the thickness of the tube.
McMaster-Carr lists pressures on their website for individual tubes. The higher pressure, the better the tube will perform. The pressure is a function of two things: the thickness of the tube (the "wall" thickness) and the area pushing on the water (which is affected by the ID of the tube). Tubes therefore can layered over each other to increase the pressure and performance. When LRT is no longer made in the right size, bike tubes can be layered over the PC to add even more pressure.
For comparison to existing water guns, water guns like the CPS 1000 operate at about 25 PSI. The CPS 2000 operates at 45 PSI. The first layer of this water gun operates at 35 PSI, and adding another layer increases that pressure beyond 50 PSI. The higher pressure is the source of the improved performance of this water gun.
Do not expect larger diameter latex tubing to work substantially better than smaller diameter tubing. While larger diameter tubing has the potential for more water flow, it also has a lot of dead space to fill, is larger, and the dead space makes it heavier as well. After I made this water gun, I tried an "upgrade" to larger diameter tubing, only to be disappointed. I would suggest using smaller tubing with larger tubing barbs. I plan on developing a way to stretch latex tubing over barbs 3/4 inch in diameter or larger. Smaller tubing is lighter due to the lack of dead space, smaller by nature, and allows for layering of tubes.
Materials
- 1-foot of 3/8 inch ID LRT (McMaster-Carr part number 5234K53)
- 1-foot of 1 inch ID LRT (McMaster-Carr part number 5234K62)
- a 5/8 inch diameter tubing barb with 1/2 inch NPT male threaded end
- 4 inch PVC drain or DWV pipe
- 2 4 inch PVC cap (if you use drain pipe, get two drain caps)
- 1/2 inch PVC pipe
- 1/2 inch PVC ball valve (threaded)
- 2 1/2 inch PVC check valves
- 2 1/2 inch PVC tees
- 2 1/2 inch PVC bends
- 2 1/2 inch PVC female threaded adapters
- 5 1/2 inch PVC male threaded adapters
- 3 or more 1/2 inch PVC threaded caps
- 2 tubing clamps for tubing 3/4 inch in diameter
- A small bolt that is at least 3/8 inch in diameter
- 1/2 inch diameter wooden dowel
- Electrical tape
- #9 O ring (7/16 inch ID, 5/8 inch OD)
- Vaseline
- 1/2 inch PVC cap (non-threaded)
- Cable ties
- Teflon tape
- Washer with about an outer diameter of about 3/4 inch
The tools this water gun requires are a drill (either a hand drill or drill press will be adequate), drill bits (in whatever sized nozzles you want and 1/2 inch), a 1 inch hole saw, a hacksaw, scissors, a screwdriver, a dremel, and preferably a clamp.
Intructions
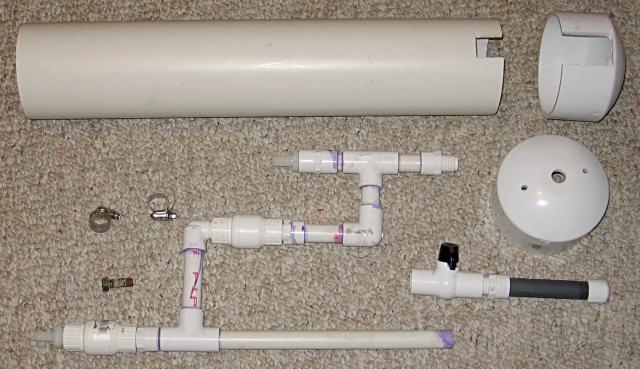
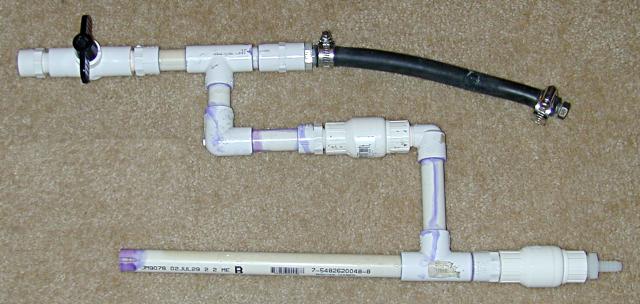
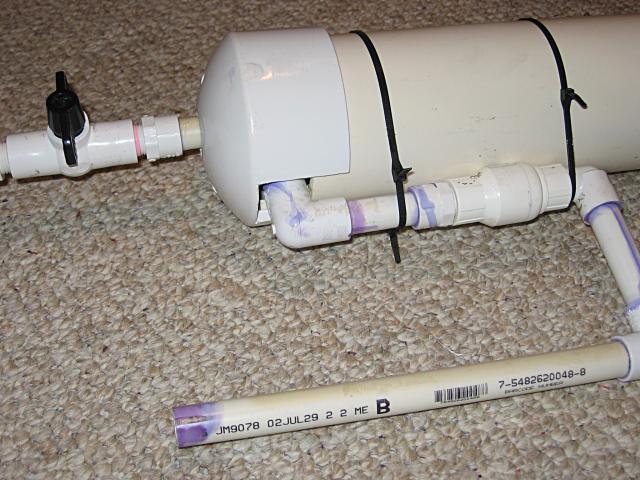
The image above shows most of the parts of the water gun, aside from the LRT. I apologize for not showing how to construct the gun itself because I did not take pictures during that construction. Regardless, this water gun is a little more advanced than the simple APH due to the LRT used, which needs to be ordered online, so I will assume some familiarity with PVC in this guide.
Essentially, buy all of the parts listed above and construct a pump assembly very much like that of the APH. Compare the image above with that on the APH article to see the similarities. However, after the second check valve, put a length of pipe, a bend pointing upward, then a tee that connects to a tubing barb on one side and the firing valve and nozzle on the other side. Be sure to use teflon tape on all of the threaded parts. That is the basic design in a nutshell. If you are having trouble, post at our forums.
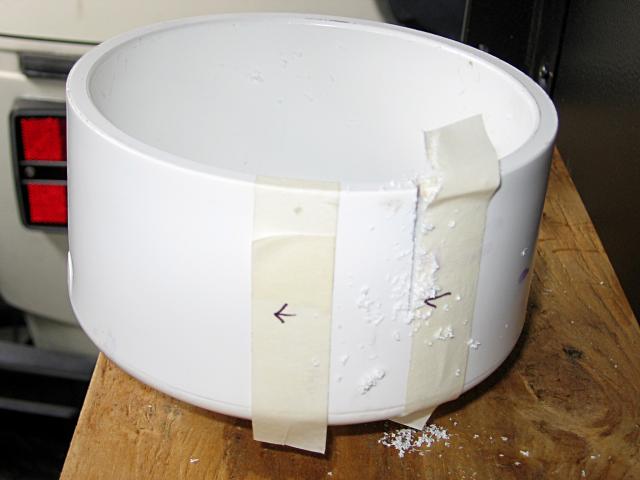
Note that the PVC pipe and endcaps are cut to have notches in them. The notches are a design feature to hold on the pressure chamber while still allowing the LRT to be replaced relatively easily. The water gun was designed to be disassembled easily to replace the LRT because through use, the LRT develops tears and weakens. Somewhat regular replacement of the LRT maintains the performance of the water gun.
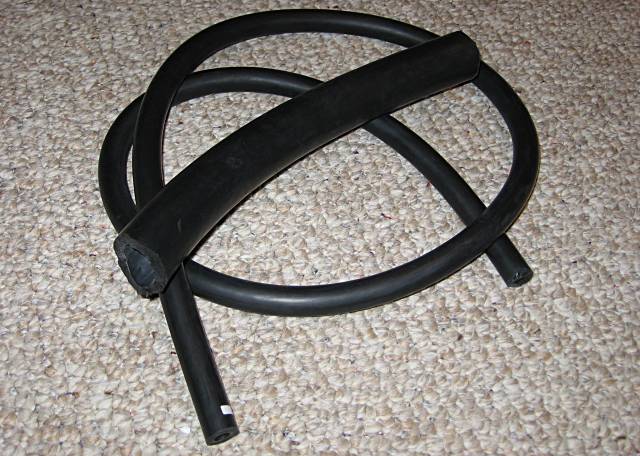
The photo above are the two tubes I ordered. The larger one slides easily over the smaller, inner, one. If you ordered more than one foot of either, cut them to length with scissors. Cutting rubber will seem difficult at first, so my advise is to cut with the scissors mostly open for the most leverage.
I suggest having at least 8 inches of LRT as a pressure chamber. 8 inches nearly removes the need for a pressure relief valve because extra pumps will translate into more shot time, not a risk of breaking the water gun. Unlike earlier CPS water guns, this water gun was designed to have a very large pressure chamber. The pressure is relatively constant, so having over a liter in the pressure chamber is advantageous because you can go longer without pumping if you are in a firefight and can not pump.
It is very possible to get this tube over a barbed fitting that is slightly larger than the ID of the tube due to the elastic properties of latex. However, it is a little difficult. You have to work the tubing on slowly. I made a showing how to put the tubing on if you are having trouble that I will add at a later time.
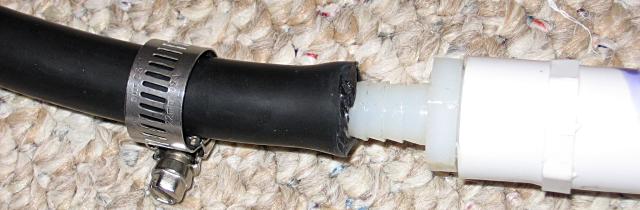
Tighten on the tubing clamps, but do not tighten so much that the clamps cut into the tubing. Special tubing clamps designed to not cut into the tubing exist, but they have to be ordered online.
The other end of the tubing can be filled with a bolt. Put the bolt in the end and tighten on the tubing clamp. Using a bolt saves some time and money.
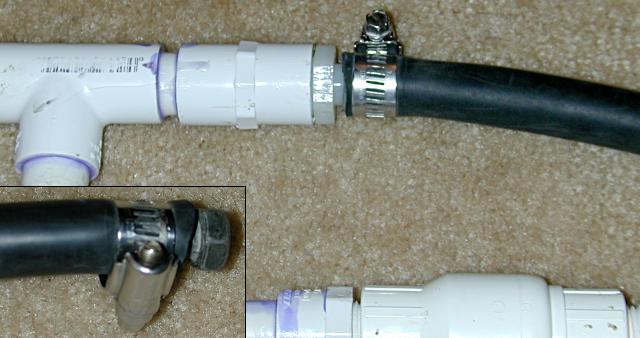
Your water gun should look approximately like this at this point. The PC casing needs to be added next.

Drill one hole in each cap for ventilation and to let a pipe through. On one cap, center the hole and use a 1 inch hole saw. That hole is where a pipe will go through to connect with the firing valve. Scroll down to see the finished product to see how that works.
Now the notches in the cap with the larger hole and the pipe must be cut. Measure about 1 3/8 inches from one point to another on the cap and mark that area with some tape as I did in the image above. Using a hacksaw, cut the cap along those lines until you get to the bottom. It will help to put the cap in a clamp. Do the same cut to the pipe. Scroll down a bit to see the finished products if you need a little help.
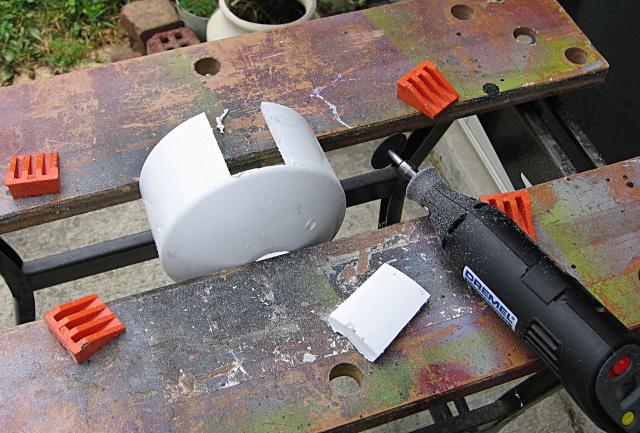
With the cap cut the entire way down, the plastic piece must be removed. The easiest way to do this is with a dremel. Do this to both the cap and the pipe so that they look like the image below.
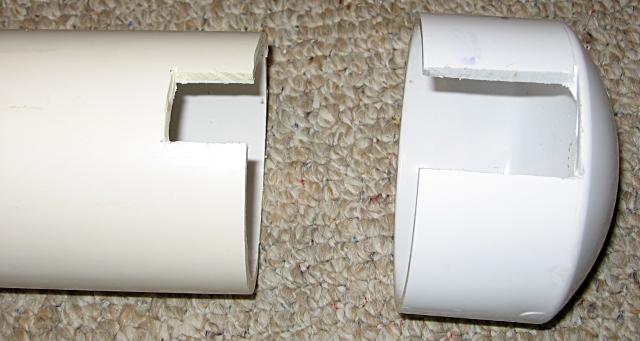
The completed pieces.
Before assembling the pressure chamber case, complete the pressure chamber by removing the tubing barb on the end of the LRT (the barb where the bolt is) and sliding the larger diameter latex tube over the smaller tube. To increase performance, additional layers of bike tubing can be added over the larger tube at this point as well. I have a video showing how easy this process is that I will add at a later time.
Remove the ball valve, and put on the cap and so that the pressure chamber has a case now. I have a video showing how I did this if you are confused that I will add at a later time. Scroll down to see the completed water gun too if you are confused.
Use cable ties to keep the pressure chamber case on more permanently.
The pump needs to be made. The pump is exactly like the pump in the APH.
Also, attach the other cap to the other end of the pipe. That cap is important because if the tubing clamps are not tight enough, the pressure chamber can shoot off like a rocket.

I added some optional straps to the water gun with cable ties.
Don't forget to print out a CPS sticker to put on the side. Paint over it with a clear paint to waterproof it.
Warning
Do not overpump this water gun. There is no safety pressure relief valve like in CPS Super Soakers. The pressure chamber is larger to compensate for that, so extra pumps for the most part translate into more shot time. However, with too many pumps, you can pop the LRT, which is not a serious problem, but it does require either cutting the burst part off or replacing the tube. You don't want to do that, so watch the chamber to see if it is nearly full. A full chamber will have no more length of unexpanded rubber tubing. The entire length will be expanded to 3 inches or more in diameter.
Photos of the completed water gun
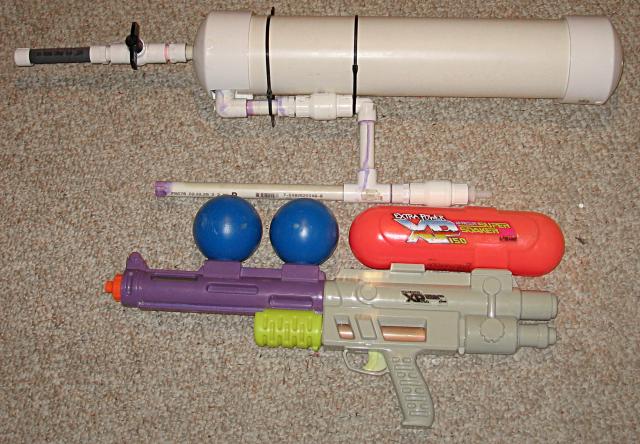
This is the nearly completed water gun with an XP 150 below it for scale.
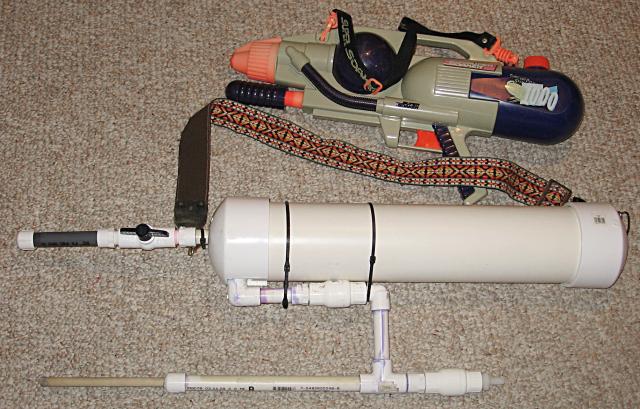
Here is another image of the completed water gun (this time with a strap and pump) with a CPS 1000 for scale.
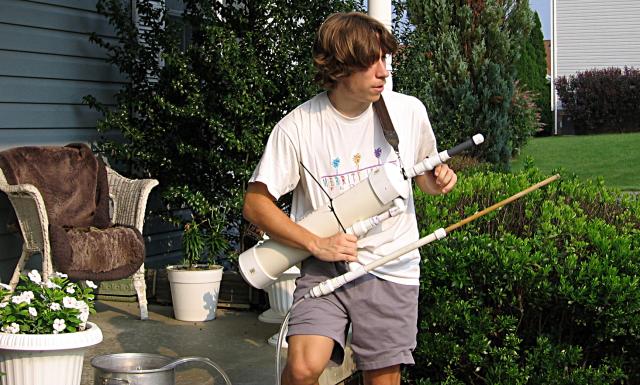
This is a photograph of me looking towards someone with SuperCPS in hand.
I also have a few videos of SuperCPS in action that I will add at a later time.